Hello, friends!
Good Morning!
Racking your brain what to do for Valentine's day? Whichever way and whomever with you want to celebrate it, today's idea will be perfect! Whether you need something for your children's classroom party or you want to plan a fun get- together with your friends, we have got plenty of ideas! Let your students be original with these easy-to- make Photo frames with borders. Most of them are so simple to put together that your students can help you nearly every step of the way!
I created a couple of fun tags in 6 different designs!
I just fell in Love with this new Tag builder from Sizzix with so many possibilities! So many extra details included in this set, Amazing!!!! So I decided to focus on them to make a variety of projects!

How I did:


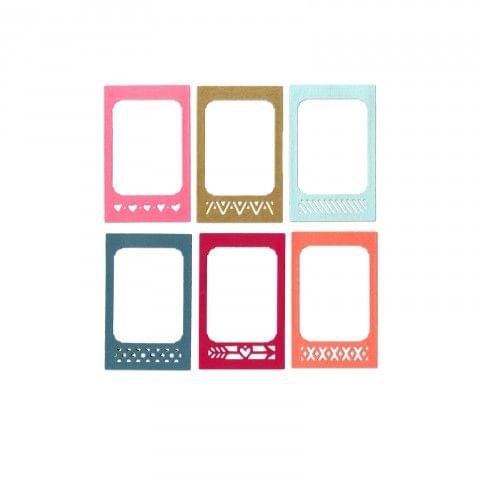
First I die cut some photo frames from various papers with designer borders. And I die cut some rectangles too out of Dotted rectangles.
Give it to your children to decorate with all craft materials. Have them to use with glitter, paint, markers, yarn etc. to create their own masterpieces to give it to friends, family and teachers!
I created a cute mini envelope using a heart die. Created the scored line and fold it.

Applied glitter glue on it.

How cute it looks on this tag!

Now I made some roses. Draw some lines in the circular direction with the same gap. Cut along the lines shown in the pic.

Using quilling tool ( optional-Tweezers), I rolled the flower as shown in the pic.

And here they are!

I love the glittery effect to create textures here! Shiny copper really pops up when paired up with kraft, red and black. I settled on them right away. The kraft photo frame added dimension and does just what they are intended to do: surround and draw attention to the focal point of each composition.

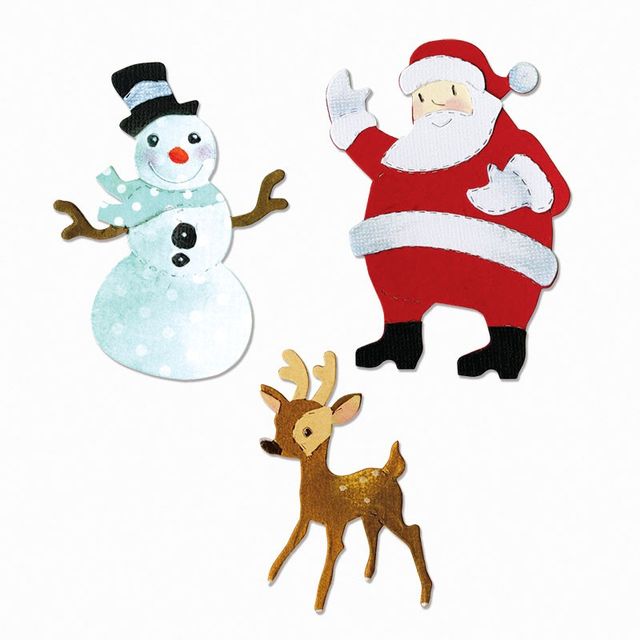
In this tag, I recycled my snowman here, you remembered I used lots of snowman in winter theme projects. So you people can also recycle some of your craft work purposefully. Here, he is holding a tiny glittery heart to celebrate the Happy moments!

I recycled this cute deer! Some fun messages can be attached here to show your love and feelings for your students. e.g. You are so deer to me; you are a Gem of my class; I love you snow much, you are the best ever, little explorer, Hey, champ love you, You rule my World etc.

You can add the personalised photo in these cute frames! I attached a jute lace, a happy sentiment with a tiny clothespin.

Here is another fun tag! It's a bit tricky, if you zoom the pic, you will see, I embossed the heart using border die from the set and it is full of glittered hearts. Then die cut arrow border and trim the edges out of it and embellished it.


Here is one more final pic!

I used the mini clothespin to hold the tags with a jute twine!
Gorgeous! I can't wait to see what you have created for your class students,
you can gift them to show your love, or you can hang them as well like banners with messages and lovable memories! You can write your class students name on it or you can attach them to several gifts or treat bags! You can add Personalised photos in the frame of your students, So many Possibilities!
I hope this little cute photo frame banner is getting you in the spirit of Valentine's day!
Here are the supplies I used:

http://www.teachingaids.in/product/sizzix-framelits-die-set-9pk-rectangles-dotted-661561
http://www.teachingaids.in/product/sizzix-thinlits-die-set-12pk-photo-frame-borders-661399

http://www.teachingaids.in/product/sizzix-thinlits-die-set-13pk-celebration-words-script-660223
http://www.teachingaids.in/product/sizzix-bigz-die-reindeer-santa-snowman-a11011
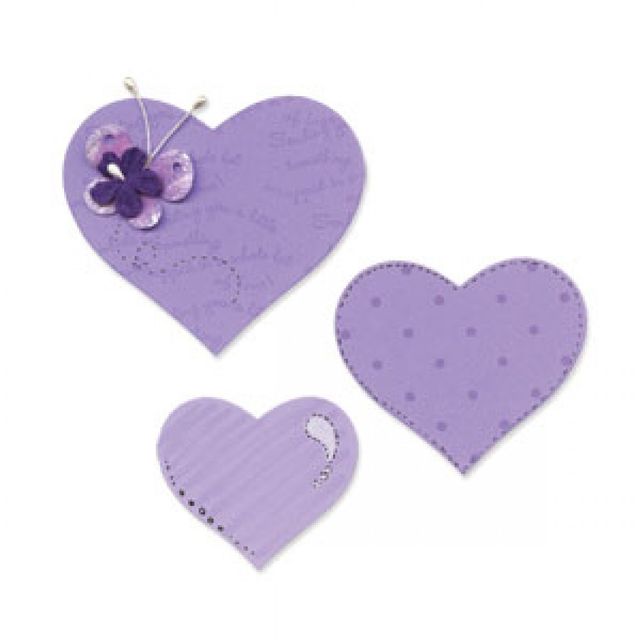
http://www.teachingaids.in/product/sizzix-bigz-die-hearts-656334
Other supplies used:
Glitter sheets, corrugated glitter sheet, designer papers, cardstocks
Glitter glue, Jute twine, jute lace, colour pens, tiny clothespins, 2 screwers, Heart shaped chalkboard, fevicol, flower pots
Happy crafting!
Vinita Jain
Good Morning!
Racking your brain what to do for Valentine's day? Whichever way and whomever with you want to celebrate it, today's idea will be perfect! Whether you need something for your children's classroom party or you want to plan a fun get- together with your friends, we have got plenty of ideas! Let your students be original with these easy-to- make Photo frames with borders. Most of them are so simple to put together that your students can help you nearly every step of the way!
I created a couple of fun tags in 6 different designs!
I just fell in Love with this new Tag builder from Sizzix with so many possibilities! So many extra details included in this set, Amazing!!!! So I decided to focus on them to make a variety of projects!

How I did:


First I die cut some photo frames from various papers with designer borders. And I die cut some rectangles too out of Dotted rectangles.
Give it to your children to decorate with all craft materials. Have them to use with glitter, paint, markers, yarn etc. to create their own masterpieces to give it to friends, family and teachers!
I created a cute mini envelope using a heart die. Created the scored line and fold it.

Applied glitter glue on it.

How cute it looks on this tag!

Now I made some roses. Draw some lines in the circular direction with the same gap. Cut along the lines shown in the pic.

Using quilling tool ( optional-Tweezers), I rolled the flower as shown in the pic.

And here they are!

I love the glittery effect to create textures here! Shiny copper really pops up when paired up with kraft, red and black. I settled on them right away. The kraft photo frame added dimension and does just what they are intended to do: surround and draw attention to the focal point of each composition.

In this tag, I recycled my snowman here, you remembered I used lots of snowman in winter theme projects. So you people can also recycle some of your craft work purposefully. Here, he is holding a tiny glittery heart to celebrate the Happy moments!

I recycled this cute deer! Some fun messages can be attached here to show your love and feelings for your students. e.g. You are so deer to me; you are a Gem of my class; I love you snow much, you are the best ever, little explorer, Hey, champ love you, You rule my World etc.

You can add the personalised photo in these cute frames! I attached a jute lace, a happy sentiment with a tiny clothespin.

Here is another fun tag! It's a bit tricky, if you zoom the pic, you will see, I embossed the heart using border die from the set and it is full of glittered hearts. Then die cut arrow border and trim the edges out of it and embellished it.


Here is one more final pic!

Gorgeous! I can't wait to see what you have created for your class students,
you can gift them to show your love, or you can hang them as well like banners with messages and lovable memories! You can write your class students name on it or you can attach them to several gifts or treat bags! You can add Personalised photos in the frame of your students, So many Possibilities!
I hope this little cute photo frame banner is getting you in the spirit of Valentine's day!
Here are the supplies I used:
http://www.teachingaids.in/product/sizzix-framelits-die-set-9pk-rectangles-dotted-661561
http://www.teachingaids.in/product/sizzix-thinlits-die-set-12pk-photo-frame-borders-661399
http://www.teachingaids.in/product/sizzix-thinlits-die-set-13pk-celebration-words-script-660223
http://www.teachingaids.in/product/sizzix-bigz-die-reindeer-santa-snowman-a11011
http://www.teachingaids.in/product/sizzix-bigz-die-hearts-656334
Other supplies used:
Glitter sheets, corrugated glitter sheet, designer papers, cardstocks
Glitter glue, Jute twine, jute lace, colour pens, tiny clothespins, 2 screwers, Heart shaped chalkboard, fevicol, flower pots
Happy crafting!
Vinita Jain